Imagine if Shopify sellers could wave magic wands at their customers
This would result to more signups, more sales and you name it
In short they would get high conversions
Doing business online would be cool, right?
Guess what?
I’m here to help you get those crazy results too
But not with a magic wand of course
In this post, I’m going to show you how to create announcement bars and boost your conversions like crazy using a powerful tool
*Works like magic*
What’s An Announcement Bar?
An announcement bar is also known as a welcome header bar, it’s a one or two-sentence announcement which is always glued at the top of a website
It pops into the top as the site loads but it doesn’t disrupt site visitors in any way, that’s why they convert like crazy
An announcement bar makes it easy for the online shop owners to inform their customers about special deals, limited time offers and whatever they can think of
Imagine how easy your marketing would be if you had one on your Shopify store?
It will be darn easy!
Now let me show you how to create your own announcement bar
How To Create An Announcement Bar In Shopify
Some links in this section are affiliate links. I may earn a small commission to buy toys for my kids if you use these links. You will not be charged extra. I only recommend high-quality products and I don’t recommend them based on the small amount I earn if you decide to make a purchase
We want to create a clean announcement bar like this one:

This was created using OptinMonster so we’ll need OptinMonster to get our desired results
Wondering what the heck is OptinMonster?
It’s the most powerful lead generating plugin, the best plugin for creating high converting opt-in forms. Learn more about OptinMonster here and how to install it on your site
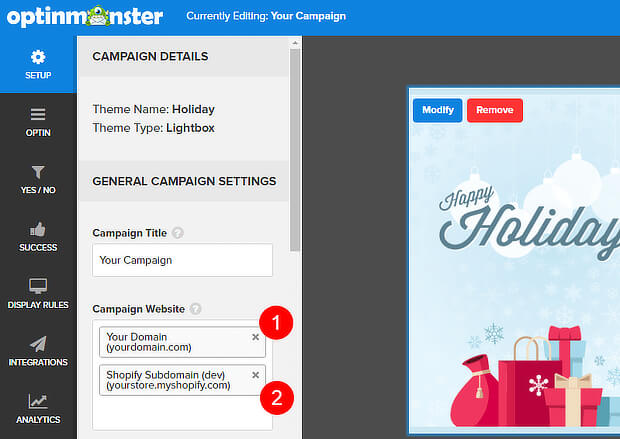
Step 1: Create A Campaign
Go to your OptinMonster dashboard and click Create Campaign then select Floating bar as your campaign type
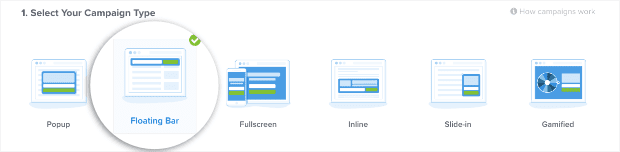
Next, choose a template
For our announcement bar to look exactly like the one above we’re going to use Tiles

Name your campaign and add the site you want to display it and then press the start button to go to the OptinMonster campaign builder
Here you’ll see the default floating bar
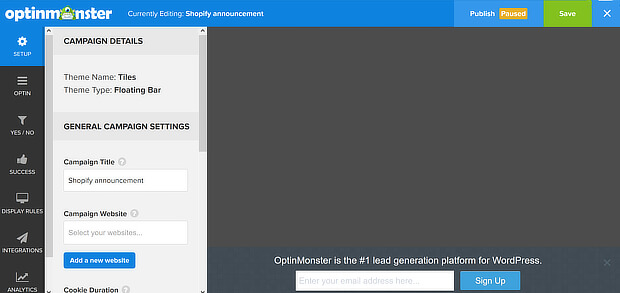
Step 2: Edit The Campaign
Now we want to edit the campaign to create our Shopify announcement bar
First, click on the floating bar and change the text to what you want to display on your site

Next, customize the bar to your liking using the pop-up toolbar
By default, the floating bar shows at the bottom of the page
But we don’t want that
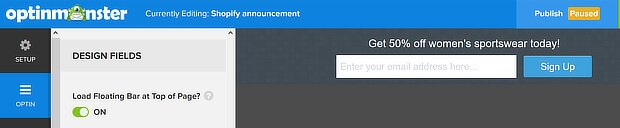
We’re going to move it to the top to make sure that every customer who visits your Shopify store sees the bar as soon as they land on your store
Now go to Optin >> Design Fields and toggle the button next to Load Floating Bar to Top Of Page
Step 3: Enable The Yes Button
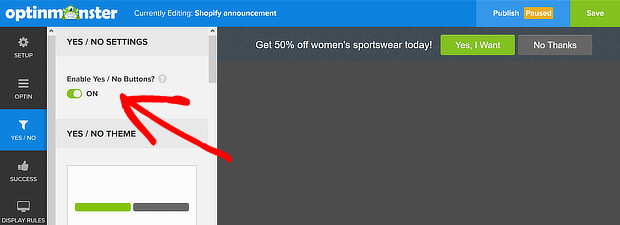
Now we want to let our customers click yes on our announcement so that we can get those conversions rolling
First, go to Yes/No settings and click the toggle to enable it
The display will show you two buttons
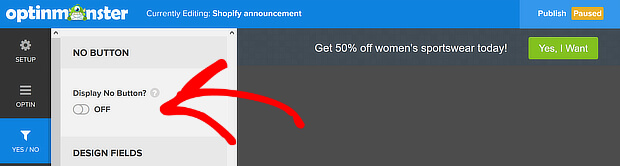
We don’t want to give our customers an option to turn down our offer so we’re going to disable the no button
Now scroll down to No Button and turn off the no button
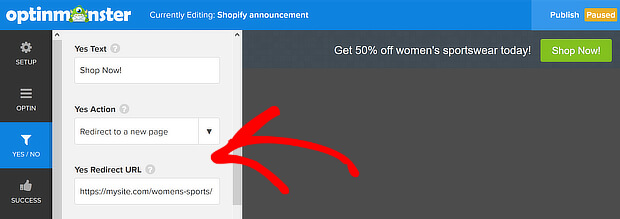
Step 4: Change The Button Text
Now let’s change the button text
Scroll back up to Yes Button and go to Yes text and change the button text
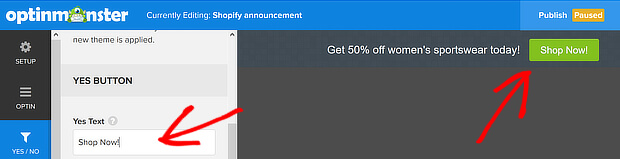
Next, we want to send our customers to the page where they’ll see our offers
Choose Redirect to the next page as your Yes Action and add the URL of the product category where you have the sale
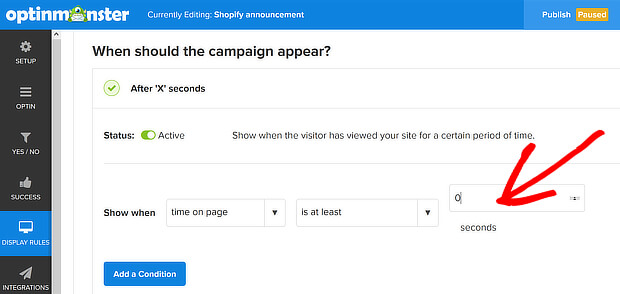
Step 5: Choose Display Rules
Now it’s time to decide how your campaign will display
You can choose to display your announcement after your customers have been on your site for a while or you can make your Shopify announcement bar permanent so all your customers see it
The display rule to display “after x seconds” is enabled by default
You can simply set the default timing to 0 if you want to make your announcement bar permanent
Now your Shopify announcement bar is ready to go live
Step 6: Add Your Announcement Bar To Shopify
To be able to publish your campaign you need to link your OptinMonster account with your Shopify store
Learn how to integrate your Shopify store with OptinMonster
Add your Shopify site in the website field in the Optin tab
Set your display rules and hit Publish and then toggle the campaign to LIVE
And wala!
Your campaign is now live on your Shopify store
That was easy, right?
Enjoy Boosting Your Conversions With Announcement Bars
Now that you know how to add announcement bars in Shopify it’s time to boost your conversion like crazy
Get OptinMonster and get the best out of your announcement bars
I hope this post helped you, please show some love kindly share with your peeps and don’t forget to follow me on Pinterest

Mathea Ford is a blogger, dietitian and mom of 2 just working on this blog to make life a little better for those around me. Check out her latest posts