
Thinking of creating a non profit donation form and start collecting donations on your WordPress site?
You’re at the right place
In this step-by-step guide, I’m going to show you how to easily create and add a donation form in WordPress
What Are The Benefits Of Adding A Donation Form In WordPress?
You might be wondering why you should add a donation form on your website instead of simply adding a PayPal button, what’s the benefit?
Well, I must admit it’s easy to add a PayPal button on your site but it’s not the right solution and here’s why you need a donation form:
- Easily gather information – You’ll be able to customize your form fields and get the information you need
- Easy to share – Your donors will likely donate because donation forms are quick and easy
- Easy integration – You can easily use other third-party software such as Cloudflare or CRM and a payment processor like Stripe
- Easy to collect emails – You can easily ask for your donors to subscribe to your newsletter
I’m sure you can agree with me now that there are more benefits in using a donation form on your website than redirecting your donors to PayPal
In short, if you use the PayPal button it’s all about you getting the donations but if you use a donation form it’s about building a professional relationship with your donors
And in this world we live in, building relationships is essential for the success of your non profit
Convinced? Now lets create a donation form for your WordPress site
How To Create A Donation Form In WordPress

Some links in this section are affiliate links. I may earn a small commission to buy toys for my kids if you use these links. You will not be charged extra. I only recommend high-quality products and I don’t recommend them based on the small amount I earn if you decide to make a purchase
There are different types of plugins that you can use to create donation forms but most of them are poorly coded and they can give your donors a poor experience which will result in fewer donations
And some are way too expensive
You don’t want that
I’m going to show you how to create your donation form using WPForms, the best contact form plugin which is lightweight, affordable and obviously provides the best user experience
That said, to create a donation form using WPForms you’ll need to install and activate WPForms pro
Don’t know how to install a plugin? Follow this step-by-step guide on how to install plugins in WordPress
Now let’s get started
Step 1: Create A Donation Form
First, go to WPForms >> Add New to create your form
Name your form on the setup screen and then hover over to the donation form template >> click Create A Donation Form to build your form
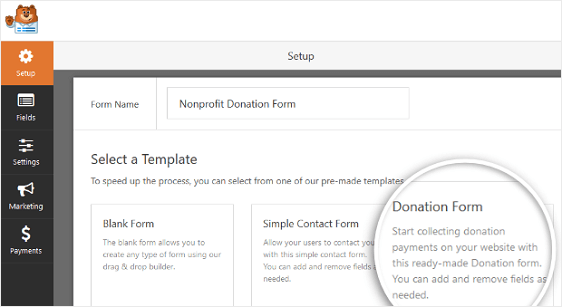
WPForms will automatically create your donation form

Step 2: Customize Your Donation Form Fields
As you can see the donation form has only four fields which are Name, Email, Donation Amount and the Comment or Message fields
I know they might not be enough for you
You can easily add more fields on your form by simply dragging them from the left-hand panel and dropping them to the right-hand panel
That’s not all, you can also add a multiple-choice payment field with several donation amounts that your donors can choose from and you’ll also be able to give them an option to enter a different amount
To add a multiple choice payment field:
On the left-hand panel, go to Payment Fields and click Multiple Items then drop the field to the right-hand panel
Next, click on the Multiple Items field to make some changes
Here’s what you can change:
- The Label– Change the label to something that’ll make sense to your donors something like “Donation Amount”
- Item – Change each item to show a different amount
- Add another item – Add an “Enter amount” option

Now that our new field is all set, the next thing we need to do is to change the Single item field to only display when the “Enter Amount” option is selected
Now click the “Donation Amount” field to make changes
Make sure that the required field isn’t checked to ensure that the donors will be able to submit the form if they select a donation amount

Next, scroll down to the menu labelled Conditionals to enter the display settings for this field
Check the “Enable conditional logic” checkbox and select the option to Show this field if Donation Amount is Enter Amount
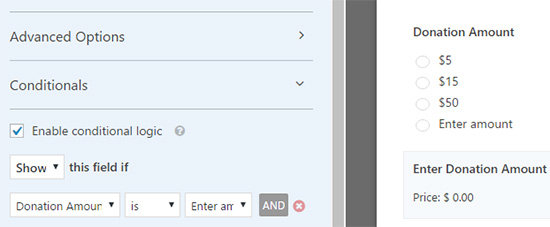
Click Save once you’re done
Step 3: Set Up The Payment Processor
In order to accept donations, you’ll need to set up a payment processor for your donations
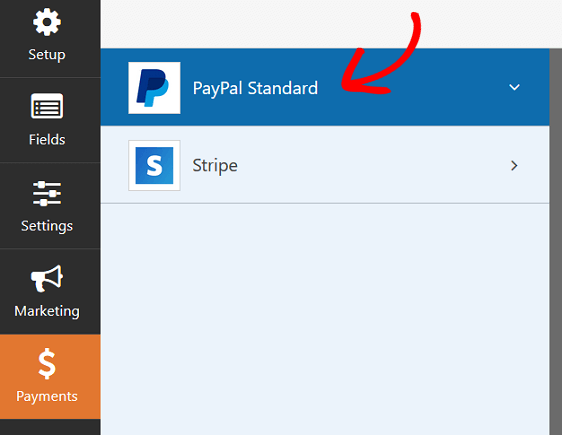
WPForms integrates with Authorize.net, PayPal and Stripe
For this tutorial’s sake, we are going to set up PayPal as our payment processor
Now click on the Payments tab on the left and click the PayPal Standard button
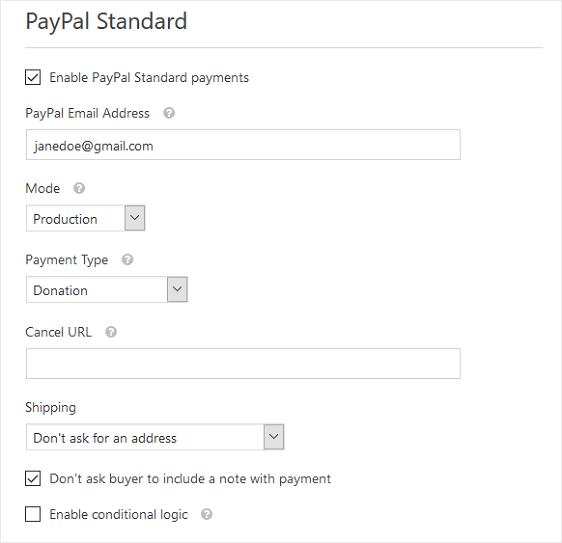
Next you’ll need to :
- Check the Enable PayPal Standard payments checkbox
- Enter your PayPal email address
- Select Donation in the Payment type dropdown
- Choose the Production mode
- Select your preferred shipping settings
- Send your site visitors to a certain URL if they cancel the checkout process
Remember to click Save when you’re done
Step 4: Customize Your Notifications
Your form is ready to go live on your site but first, we need to make sure that your donors receive a confirmation email when they donate
To customize the email notifications:
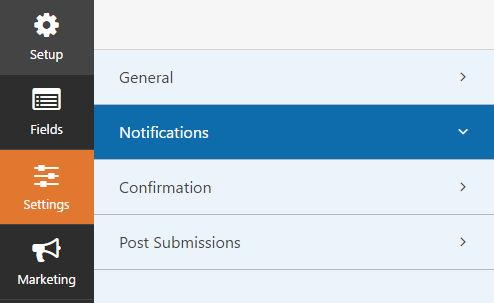
Click Settings >> Notifications
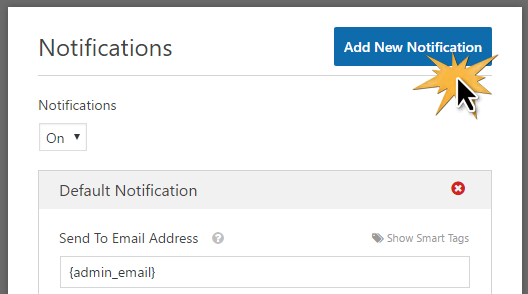
There’s a default notification that’ll be sent to the site admin
Now click the Add New Notification button to create a separate notification for the donors
Name your notification in the pop-up window and click OK
Then, next to Send to Email Address click Show Smart Tags and choose Email in the list that pops up
Now scroll down and customize the message you want your donors to receive
Don’t forget to click Save, now we’re going to the final step. Yay!
Step 5: Add Your Non Profit Donation Form To Your WordPress Site
Now that your form is ready you need to add it to your WordPress site so that you can start receiving your donations
WPForms allows you to add your forms anywhere you can think of, be it inside your blog posts, pages or even on sidebar widgets
That said, in this tutorial we are going to add our donation form to a page
Head over to your WordPress dashboard and click on Pages >> Add New
I assume you’re using the WordPress Block editor
Now click the plus icon >> Widgets >> WPForms and select your donation form
Hit Publish and you’re done!
Voila! your non-profit donation form is now live on your WordPress site
Enjoy Receiving Donations On Your WordPress Site
Now you know how to create a non-profit donation form in WordPress
What’s left is for you to take action, Get the best user-friendly WordPress plugin and enjoy receiving donations on your site
I hope this post helped you, please show some love kindly share with your peeps and don’t forget to follow me on Pinterest

Mathea Ford is a blogger, dietitian and mom of 2 just working on this blog to make life a little better for those around me. Check out her latest posts