Do you have sales promotion coming up?
Are you thinking of a way to boost your sales this time?
You’re at the right place
In this post, I’m going to show you how to boost your online sales by adding a countdown timer pop up on your site
Why Use Count down Timer Pop-ups On Your Site
Instead of telling your customers that it’s a limited time offer, you’ll show them the exact days or hours left for the promotion to end
This will create urgency which will result in more sales
A count down timer is the easiest solution if you seriously want to quickly boost your sales
How To Create A Countdown Timer Pop-up In 7 Easy Steps
Some links in this section are affiliate links. I may earn a small commission to buy toys for my kids if you use these links. You will not be charged extra. I only recommend high-quality products and I don’t recommend them based on the small amount I earn if you decide to make a purchase
For us to create a high converting animated countdown timer pop up we are going to use OptinMonster
OptinMonster is a premium lead generating software
The good thing is it works with all CMS so you don’t need to worry if you don’t use WordPress
Now let’s create our count down timer pop up
Step 1: Create A Floating Bar Opt-in
Go to your OptinMonster dashboard and click the green Create Campaign button

Next select Floating Bar

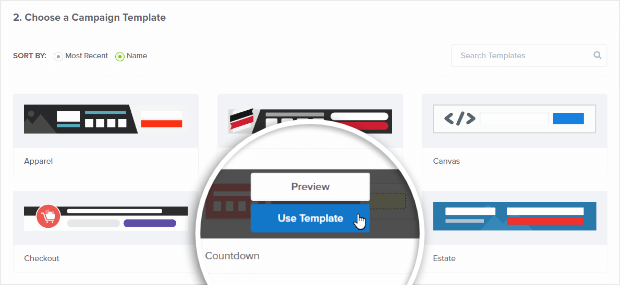
Hover over the Countdown template and click the blue Use Template button
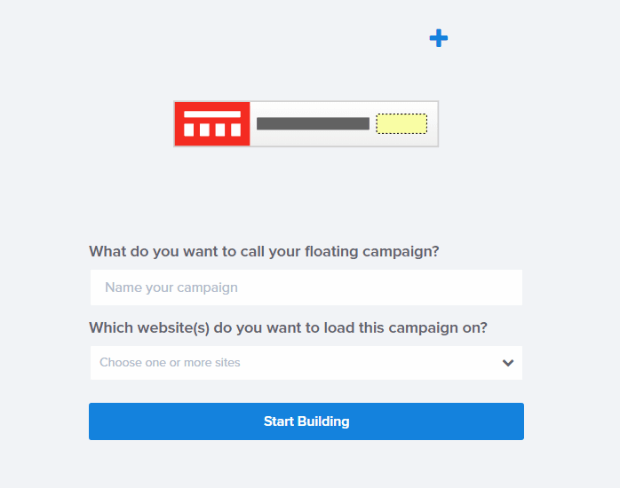
Enter the name of your sales timer and select your site from the dropdown menu
Then click the start building button to enter the campaign builder
Don’t forget to click save at the top right corner of the builder
Step 2: Update the Display Settings
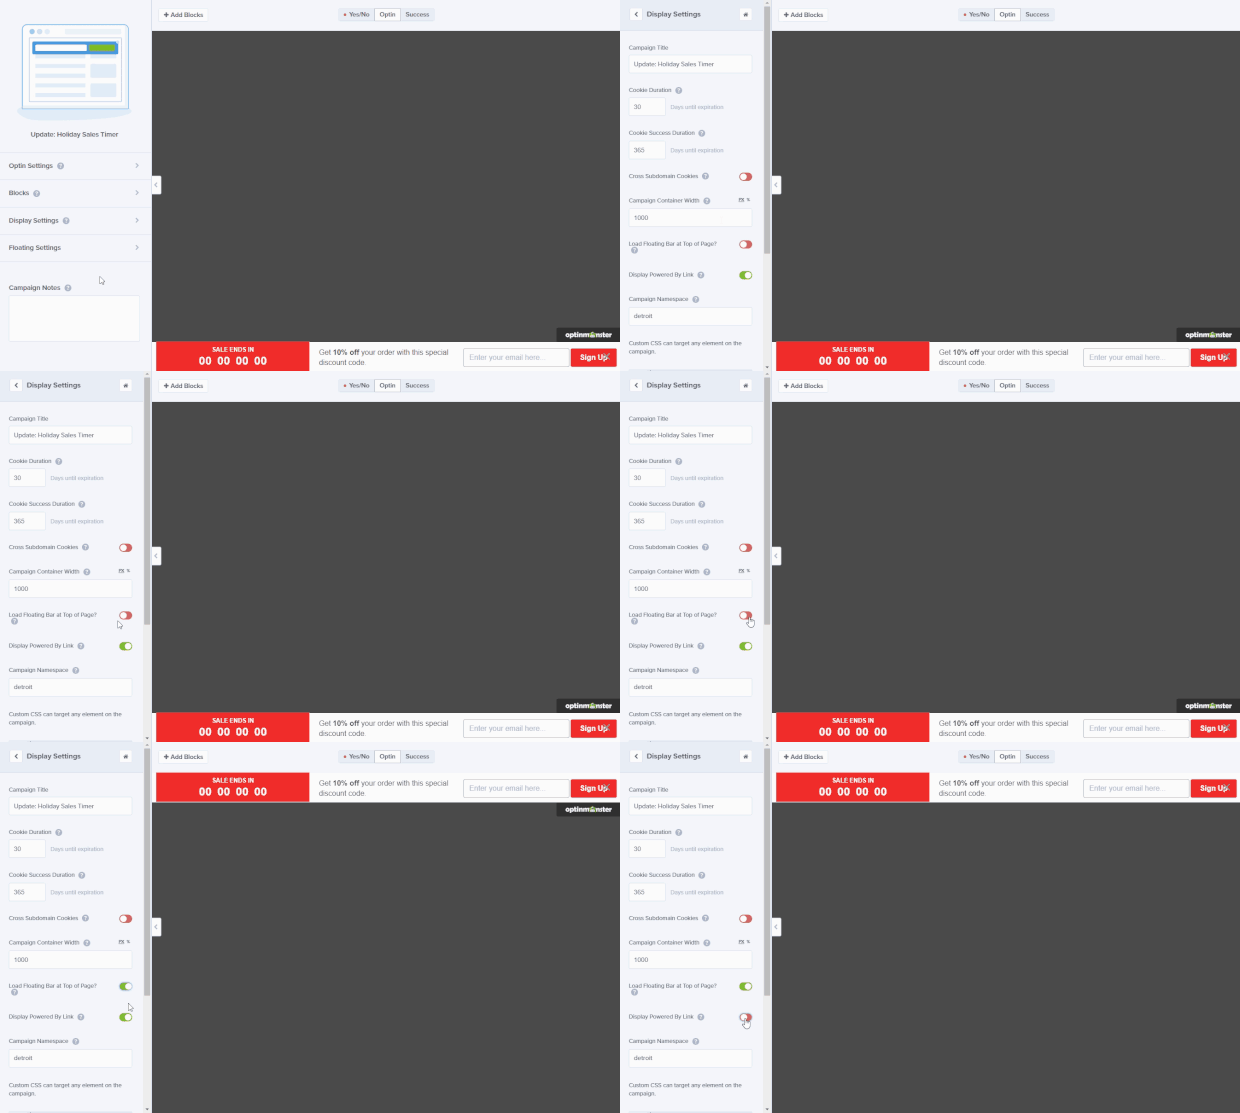
By default the timer shows up at the bottom of your site
If you want it to show to the top of your site click Display Settings and activate Load Floating Bar at Top of The Page
You can also deactivate the Powered By Link to save screen space
Step 3: Set The End Date/Time
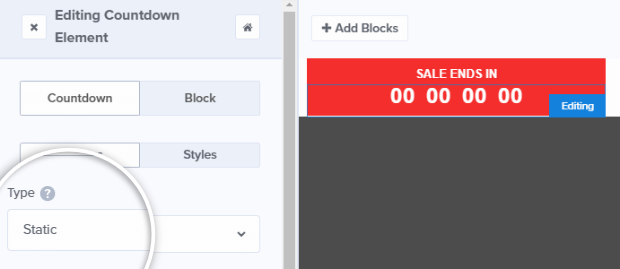
Click directly on the countdown clock in the live preview, this will bring up the editing tools
Set the Type to Static so your visitors see the exact countdown when they visit your site
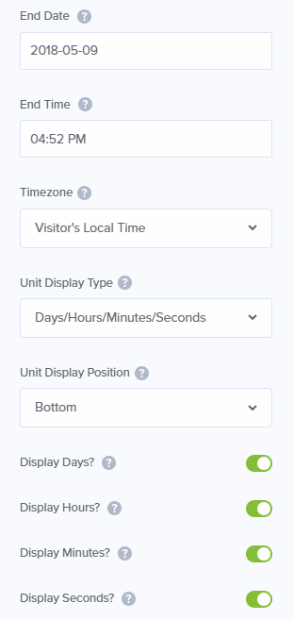
Next enter the date and time settings for when your sale ends and how to display the information, all changes will appear live in the preview as you make them
Step 4: Customize The Copy And Design
You can customize the floating bar to match your brand
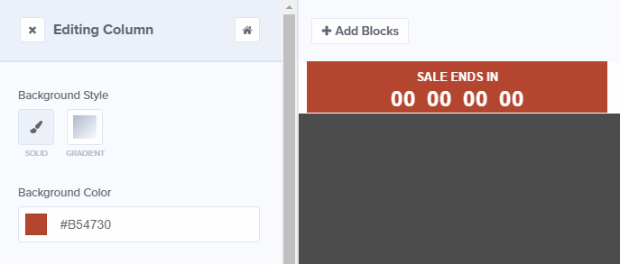
To do that hover over the “Sales ends in“ text and two small gray icons will appear
Now click the settings icon to edit the styling and the settings of the column

Here you can change the column back ground to your liking
Design Offer Text
Now let’s change our offer text
Click on the offer text in the live preview to bring up the editing tools

Let’s change the text to “Thanksgiving Sale: Get 25% off any order!”
Here you can also customize your fonts and colors

Design The Opt-in Button
Now we want to match our Sign Up button with the countdown timer color and change the button text
Click directly on the button in the live preview and click on the button tab to edit the button

Design The Success View
Now that your visitors can opt-in to get access to the coupon code let’s set up a success view so they can get the coupon code once they complete their sign up
Click on the Success tab

Step 5: Connect an Email Service Provider
You’ll need to connect your opt-in to your email service provider so you can collect email addresses
OptinMonster integrates with all of them
To connect your service provider:
Go to the Integrations tab

Click Add New Integration and select your email provider from the dropdown list
You’ll see a new window for your email provider login credentials >> enter your login credentials and click the login button
Once you’re logged allow access to OptinMonster and enter a unique label for your email account and select the connect button
Lastly, OptinMonster fetches your email list, choose an email list you want your visitors to subscribe to and don’t forget to save your campaign
Step 6: Set The Display Rules
Now it’s time to set display rules
Go to the Display Rules tab and set your floating bar to be displayed on or before a certain date
Next, set who should see this campaign so whenever your site visitors land on a certain page they’ll see the countdown popup
In this case, we would like our countdown pop up to be displayed on the “shop” page so let’s set the second condition to content URL path exactly matches shop

Remember to hit save before we move on to the next step
Step 7: Publish Your Countdown Popup
This is the final step, great job!
Now we want our countdown timer to go live and start making those sales
Simply go to the Publish tab >> toggle the Status to live and save the campaign

That’s all!
Enjoy making more sales with a countdown timer pop up
I hope this post helped you, please show some love kindly share with your peeps and don’t forget to follow me on Pinterest

Mathea Ford is a blogger, dietitian and mom of 2 just working on this blog to make life a little better for those around me. Check out her latest posts

